Managing projects can be a daunting task, especially when there are multiple tasks, team members, and deadlines to juggle. That’s where Trello, a user-friendly project management tool, comes in. Trello uses boards, lists, and cards to help teams visually organize and prioritize their tasks. In this step-by-step guide, we’ll walk you through how to create a Trello board for your project management needs. By the end of this guide, you’ll be well-equipped to use Trello effectively to streamline your projects and improve team collaboration.
Table of Contents
What is Trello and Why Use It for Project Management?
Trello is a web-based project management application that allows you to organize your tasks and projects visually. Its simplicity and flexibility make it an ideal tool for teams of all sizes. Whether you’re managing a small project or coordinating a large team, Trello helps you keep everything in one place.
Why Use Trello for Project Management?
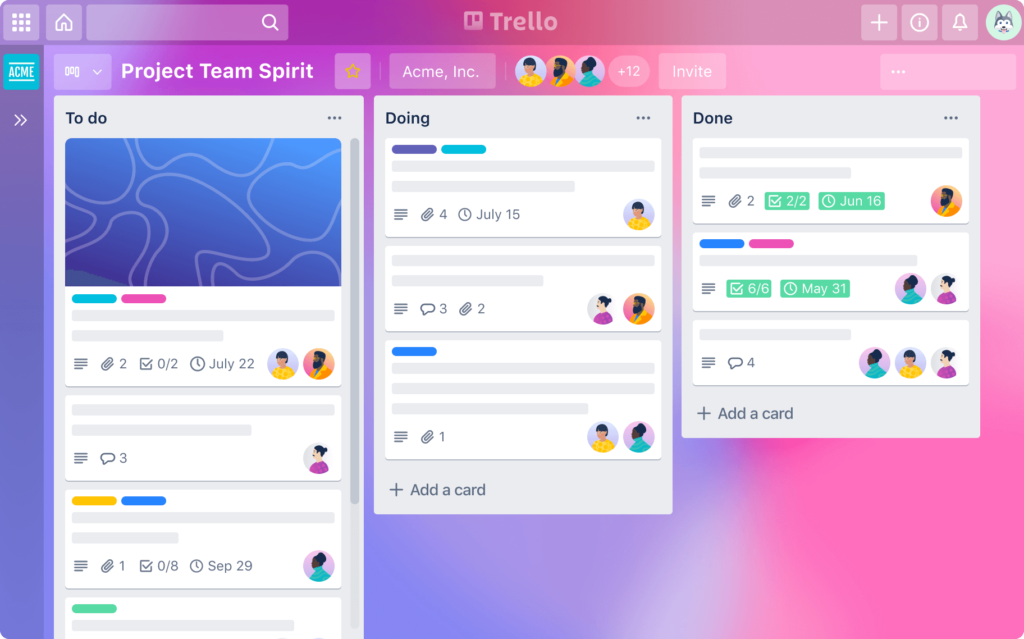
- Visual Organization: Trello’s board-based system allows you to see the entire project at a glance.
- Easy Collaboration: Trello makes it easy for team members to collaborate, share updates, and stay aligned.
- Customizable: Trello boards can be tailored to fit any project, making it versatile for different types of workflows.
- Accessible Anywhere: Trello is available on multiple devices, allowing you to manage your project on the go.
Steps to Create a Trello Board for Your Project
1. Sign Up and Log In to Trello
The first step in creating a Trello board is to sign up for an account. If you already have a Trello account, simply log in.
Here’s how to get started:
- Go to Trello.com: Visit the Trello website.
- Sign Up: If you don’t have an account, click on “Sign Up” and enter your details. You can sign up with your email, Google account, or Microsoft account.
- Log In: If you already have an account, enter your email and password to log in.
Once logged in, you’ll be taken to the Trello home screen, where you can see all your existing boards or create a new one.
2. Create a New Board
Creating a new board is simple and quick. A Trello board acts as a workspace where you can manage a specific project.
Steps to create a new board:
- Click on “Create new board”: On the Trello home page, you’ll see an option to create a new board.
- Name Your Board: Enter a name that reflects the project or purpose of the board.
- Choose a Background: You can select a background color or image to personalize your board.
- Select the Visibility: Decide whether the board will be private, visible to your team, or public.
- Click “Create Board”: Your new board will now appear on your Trello homepage.
3. Add Lists to Your Board
Lists in Trello represent the stages or categories of your project. They help you organize tasks and track progress.
To add lists to your board:
- Click “Add a list”: This option is available on the left side of your board.
- Name Your List: Name your list based on the phase or category of tasks (e.g., “To Do,” “In Progress,” “Done”).
- Add More Lists: You can add as many lists as needed to cover the different aspects of your project.
4. Create and Customize Cards
Cards in Trello represent individual tasks or items within a list. They are the building blocks of your Trello board and can be customized to include detailed information.
To create and customize cards:
- Click “Add a card”: You’ll find this option at the bottom of any list.
- Name Your Card: Give your card a title that clearly describes the task.
- Click on the Card to Edit: Once you click on the card, you can add more details, such as descriptions, due dates, attachments, checklists, and labels.
- Move Cards Between Lists: As tasks progress, you can drag and drop cards from one list to another.
5. Invite Team Members to Your Board
Collaboration is a key feature of Trello, and inviting team members to your board is easy.
To invite team members:
- Click “Invite”: This option is available on the top right corner of your board.
- Enter Email Addresses: You can invite team members by entering their email addresses.
- Set Permissions: Choose whether the team members can edit or view the board.
- Click “Send Invitation”: Your team members will receive an invitation to join the board.
Best Practices for Managing Projects on Trello
Using Trello effectively requires more than just setting up a board. Here are some best practices to ensure your projects run smoothly:
- Keep It Simple: Avoid overcomplicating your board with too many lists or cards. Simplicity helps maintain clarity and focus.
- Use Labels and Filters: Labels can help categorize tasks, and filters make it easier to find specific cards.
- Regularly Update Cards: Keep your cards up to date with the latest information to ensure everyone is on the same page.
- Archive Completed Tasks: Once tasks are done, archive them to keep your board clean and organized.
Tips for Effective Team Collaboration Using Trello
Collaboration is at the heart of project management, and Trello makes it easy for teams to work together efficiently. Here are some tips to enhance team collaboration:
- Communicate Clearly: Use the comments section in each card to communicate with team members. This keeps all discussions about a task in one place.
- Assign Tasks: Clearly assign tasks to specific team members to avoid confusion and ensure accountability.
- Use Checklists: Break down tasks into smaller steps using checklists. This makes it easier to track progress.
- Set Deadlines: Use due dates to keep your project on track and ensure that everyone meets their deadlines.
Advanced Trello Features to Enhance Project Management
Trello offers several advanced features that can further improve your project management experience:
- Power-Ups: Trello’s Power-Ups allow you to integrate other tools (e.g., Slack, Google Drive) and add extra functionality to your board.
- Butler Automation: Automate repetitive tasks using Trello’s Butler feature. For example, you can set up rules to automatically move cards between lists when certain actions are completed.
- Calendar View: The calendar view Power-Up lets you see all your tasks with due dates in a calendar format, making it easier to manage timelines.
- Custom Fields: Add custom fields to cards to track specific data points relevant to your project.
Integrating Trello with Other Project Management Tools
Trello can be integrated with a variety of other project management tools to enhance your workflow:
- Slack: Integrate Trello with Slack to receive updates and interact with your Trello boards directly from Slack channels.
- Google Drive: Attach Google Drive files to your Trello cards for easy access to important documents.
- Asana: If your team uses Asana, you can sync it with Trello to keep all your project management tools in harmony.
Common Mistakes to Avoid When Using Trello
Even though Trello is easy to use, there are common mistakes that can hinder its effectiveness:
- Overloading Boards with Information: Too much information on a single board can lead to clutter and confusion. Keep your boards focused and organized.
- Neglecting to Update Tasks: Failing to update tasks regularly can result in outdated information, leading to miscommunication and delays.
- Ignoring Power-Ups: Trello’s Power-Ups offer valuable features that can enhance your project management. Make sure to explore and utilize them.
Case Study: Successful Project Management Using Trello
To illustrate Trello’s effectiveness, let’s consider a case study of a marketing team using Trello for a product launch. The team created a board with lists for different phases of the launch, such as planning, content creation, and promotion. Each card represented a specific task, and team members were assigned tasks with clear deadlines.
By using Trello, the team was able to:
- Stay organized: All tasks were clearly defined and easy to track.
- Improve communication: Comments and updates on cards kept everyone informed.
- Meet deadlines: The calendar view and due dates ensured that the project stayed on schedule.
Conclusion: Boost Your Project Management with Trello
Trello is a powerful tool for managing projects of all sizes. Its flexibility, ease of use, and collaborative features make it an excellent choice for teams looking to stay organized and productive. By following this step-by-step guide, you can create a Trello board that helps you streamline your project management process and achieve your goals.
Whether you’re a beginner or an experienced project manager, Trello offers the tools you need to manage tasks, collaborate with your team, and keep your projects on track. Start using Trello today and see how it can transform the way you work.
For more content: Finance related, Applications related, Websites related.