DigiLocker account in India is essential for anyone who wants to securely store and access their important documents online. DigiLocker, an initiative by the Indian government, provides a safe and convenient way to keep your documents in a digital format. This guide will walk you through the process of setting up your DigiLocker account step-by-step.
Why You Should Create a DigiLocker Account in India
DigiLocker is a key part of India’s Digital India initiative, aimed at transforming India into a digitally empowered society. With DigiLocker, you can store your important documents like Aadhaar, PAN, driving license, and educational certificates securely in the cloud, making them accessible anytime, anywhere.
Benefits of Creating a DigiLocker Account:
- Convenience: Access your documents online from anywhere.
- Security: Store documents safely in a government-backed digital locker.
- Efficiency: Eliminate the need to carry physical copies of documents.
- Authenticity: Verified documents in DigiLocker are considered valid by various authorities.
Step 1: Registering for a DigiLocker Account in India
To start with creating a DigiLocker account in India, follow these steps:
- Visit the DigiLocker Website or Download the App: Go to DigiLocker’s official website or download the DigiLocker app from the Google Play Store or Apple App Store.
- Click on “Sign Up”: On the homepage, you’ll see a “Sign Up” button. Click on it to start the registration process.
- Enter Your Mobile Number: You’ll be asked to enter your mobile number. Make sure it’s the same number linked to your Aadhaar card for a smoother verification process.
- Receive and Enter OTP: You’ll receive a One-Time Password (OTP) on your registered mobile number. Enter this OTP to proceed.
- Create a Username and Password: After verifying your mobile number, you’ll need to create a username and password for your DigiLocker account. Ensure your password is strong and unique.
- Link Your Aadhaar Card: You’ll have the option to link your Aadhaar card to your DigiLocker account. This is not mandatory but recommended for easier document verification and access.
Step 2: Verifying Your DigiLocker Account in India
After successfully registering, the next step in creating a DigiLocker account in India is to verify your account.
- Aadhaar Verification: If you’ve chosen to link your Aadhaar card, you can verify it through OTP or by using your Aadhaar number.
- Email Verification: You’ll also be asked to verify your email address. DigiLocker will send a verification link to your email. Click on the link to verify.
- Profile Completion: Once verified, you’ll need to complete your profile by adding details like your name, date of birth, and gender.
- Setting Security Questions: For added security, you’ll be prompted to set up security questions. These will help you recover your account in case you forget your password.
Step 3: Uploading Documents to DigiLocker
With your DigiLocker account now set up and verified, you can begin uploading documents.
- Navigate to the “Upload Documents” Section: In your DigiLocker dashboard, you’ll find an option to upload documents.
- Select Documents to Upload: Choose the documents you wish to upload from your device. These can include scanned copies of your Aadhaar, PAN, driving license, and more.
- Categorize Your Documents: DigiLocker allows you to categorize your documents for easy access. For example, you can create categories like “Identification,” “Education,” and “Financial.”
- Assign Document Names: Give each document a name that clearly identifies it, such as “PAN Card” or “10th Grade Marksheet.”
- Save and Secure Your Documents: Once uploaded, your documents are securely stored in DigiLocker. You can access them anytime by logging into your account.
Step 4: Accessing Issued Documents in DigiLocker
One of the key features of creating a DigiLocker account in India is the ability to access government-issued documents directly.
- Click on the “Issued Documents” Section: This section in DigiLocker shows documents issued directly by government agencies, such as your Aadhaar card or driving license.
- Search for Issued Documents: Use the search bar to find specific documents that have been issued to you by different agencies.
- Access and Download: Once you locate the document, you can view, download, or share it directly from DigiLocker.
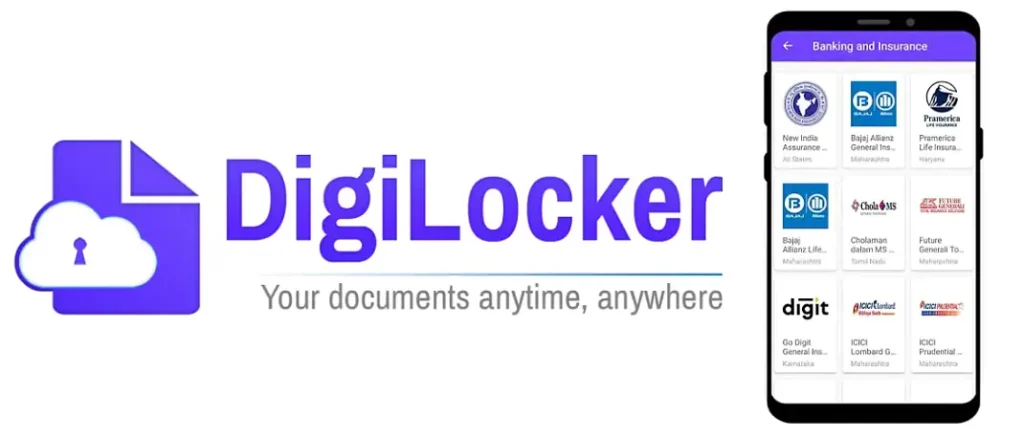
Step 5: Linking External Accounts to Your DigiLocker
To enhance the functionality of DigiLocker, you can link external accounts like your bank account, insurance policies, and more.
- Go to the “Link External Accounts” Section: In your DigiLocker account, you’ll find an option to link external services.
- Select the Services to Link: Choose from a list of available services, such as banks, insurance companies, or educational institutions.
- Provide Necessary Information: Depending on the service, you may need to provide account numbers, policy numbers, or other relevant details.
- Verify and Link: Complete the verification process as required by the external service provider to link your account.
Comparing DigiLocker with Other Document Storage Services
DigiLocker vs Google Drive:
- Security: DigiLocker is a government-backed service with robust security features tailored for Indian citizens, while Google Drive is a general cloud storage service.
- Accessibility: DigiLocker integrates directly with Indian government services, making it easier to access government-issued documents.
DigiLocker vs OneDrive:
- Cost: DigiLocker is free to use, while OneDrive offers limited free storage with the option to upgrade.
- Integration: DigiLocker’s integration with Indian government databases gives it a unique advantage over general cloud storage services like OneDrive.
Important Tips for Using Your DigiLocker Account
- Regularly Backup Documents: Even though DigiLocker is secure, it’s a good idea to keep backup copies of your documents.
- Update Documents: Keep your documents up-to-date to ensure you always have the latest version.
- Secure Your Account: Use a strong password and enable two-factor authentication to protect your DigiLocker account.
Conclusion
Creating a DigiLocker account in India is a simple yet powerful step toward managing your important documents digitally. Whether you’re storing your Aadhaar card, driving license, or educational certificates, DigiLocker offers a secure and accessible platform to keep all your documents in one place. Start your digital journey today by setting up your DigiLocker account and enjoy the convenience of having your documents just a click away.
External Links:
This guide should help you navigate the process of setting up and using DigiLocker effectively. By following the steps outlined above, you’ll be able to store and access your important documents securely online.
For more content: Finance related, Applications related, Websites related.